Disclosure: As an Amazon Associate, I earn from qualifying purchases. Meaning if you decide to make a purchase via my links, I may earn a commission at no additional cost to you.
Note to reader: A teacher once told me, “Proper preparation Prevents Poor Performance!” It was true for test prep, and it is true for prepping for any outdoor adventure, even a day hike. Research the products and gear you will carry and learn how to use them. Study the trails and environment you plan to explore before you go. Make sure you let someone know where you are heading and when you plan on coming back. If you are bringing a phone or an emergency contact device, make sure it is charged and you know how to use it! Having an emergency device is not an alternative for doing your homework and for getting prepared. It should only be used in an emergency. It is often said, “experience is the best teacher,” and I would agree. If you live in NJ or in the Tri-State area and want to learn fun and valuable outdoor skills before setting out on your own, sign up for one of my core programs, Adventures With Backyard Bushcraft.
ADVENTURE IS CALLING. WILL YOU ANSWER?
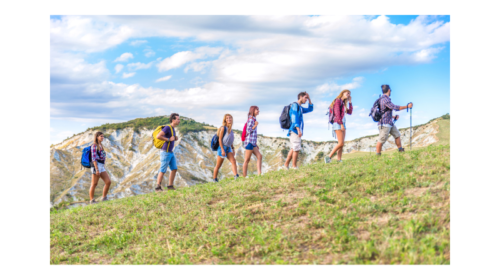
Summer is officially here! That means you are dealing with the irresistible urge to turn on your out of office, pack up your car or backpack (or both) and head out for a grand adventure. If you have children, chances are they have been begging for months to go hiking, camping, and fishing. Summer break, just means they are likely asking more persistently. I hope you listen to adventures’ call or finally relent to your children’s wishes to spend time in the great outdoors. However, before you do, please get prepared!
Life is unpredictable, but you can take steps to ensure that your next outdoor adventure is a successful one. This is not a doom and gloom post, so I will not highlight any recent news stories about people who set out for adventures ill prepared. Let’s just say, many unfortunate events and tragedies can be prevented with proper preparation.
The Rule Of Three
Before setting out for your adventure, it is wise to consider the age-old, outdoor survival lesson, commonly referred to as The Rule Of 3. In essence, the rules state that bodily harm and eventually death will occur within the following parameters:
- 3 minutes without oxygen.
- 3 hours without shelter (think extreme conditions; blistering heat, freezing cold, rain and snowstorms etc.).
- 3 days without water.
- 3 weeks without food.
The one rule I always add in, and it goes on the top of my rules when teaching survival, is that it only takes 3 seconds to make a bad decision due to fear and a negative mindset. Your mind can bring about your demise well before the other rules of 3 get you. The best way to deal with this rule and all the others? You guessed it, be prepared!
The Rule Of Three: Solutions
This brings about the next Rule Of Three to help you deal with the first rules of survival. In essence, you should always have 3 ways to cover your basic needs (shelter, fire, water, food) in the wilderness. This might seem like overkill, but having 3 methods ensures that if one system fails or even two systems, you still have backup! “That sounds like a lot of stuff to carry for a day hike!” Believe it or not, all the gear you are about to discover can fit inside of a small backpack and even a fanny-pack with practice. We will cover how to pack for an adventure in a future post.
By educating yourself now for your future adventure, you are creating a survival mindset that will help prevent you from making bad choices when the unpredictable strikes. Below is my survival/preparedness essentials for adventures small and large:
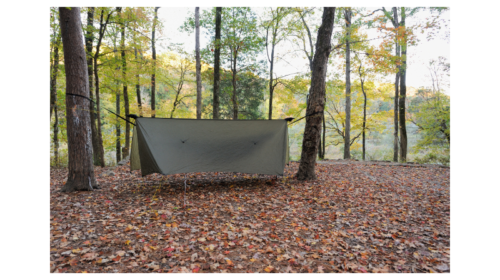
SHELTER
- Heavy Duty Lawn/Contractor Garbage Bag. This bag can be transformed with some simple knife work into a poncho for rain and snow protection. (Knife selection and proper usage is a big subject and one I will tackle in a future post. In the meantime, if you are searching for one now, you can not go wrong with this knife from Morakniv.) Your trash bag can also become an emergency sleeping bag that you can stuff with leaves and other insulating materials. It can become an improvised tent with a few improvements and some rope. This handy bag can also be used to collect debris (leaves, pine needles, branches etc.) if you need to make a more robust shelter. Believe it or not, it can also be used to collect water. Best of all, they are inexpensive and you most likely have a bunch in your garage.
- A light weight multi-purpose tarp. The tarp I always carry has a bright exterior color to make it easy to locate and a reflective side for heat retention, signaling airplanes, and more.
- Reflective Thermal Emergency Bivvy Bag. A bivvy-bag is in essence a sleeping bag and a shelter all in one. It is designed to keep you warm and to keep the elements out. I have used them on several occasions to keep participants warm and dry when nature turned stormy. It is not the lightest option; however, it is designed to be used more than once and is therefore a bit heavier. It is still less than 1 pound, and worth the extra weight in your pack. If you are looking for one that is a bit lighter in weight and on the wallet, this one should get the job done and the bonus is you get 2 bags per box.
- Note: Your clothing is your first shelter, so dress for your environment and have layers in the event the weather changes. Avoid cotton, especially in the winter, as it retains moisture and is not a great insulator. Wear/bring clothes that wick moisture away from the body and dry quickly. We will cover how to dress for the outdoors in more detail in a future post . Additionally, if you are setting out for an overnight or extended trip in the backcountry, you will need to have a reliable tent that you have set up, tested, and ensured all the parts are accounted for. I have been on trips where somebody forgot the tent poles! You should be very familiar with the setup, even in the dark. We will also discuss tent and shelter options in a future post. That all said, you still want to have 3 methods of making shelter with you in the event something happens to your primary shelter.
For me, fire comes next in the order of survival. Fire will help you to stay warm, signal search parties, cook food and treat water. Fire will also help foster psychological comfort for you and anyone else in your group. Please remember to treat fire as both a gift and a curse. Adding burns to a survival situation could be disastrous. Furthermore, an untended fire can cause tremendous ruin to anything in its path.
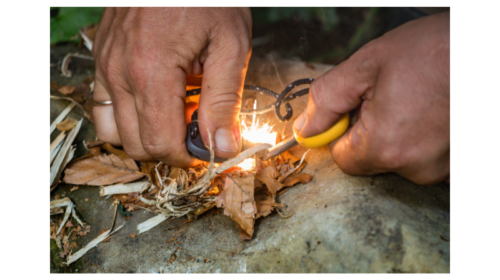
FIRE
- Waterproof matches inside a waterproof container. These matches can ignite even when wet. Check out the rave reviews.
- Ferro Rod Fire Starter. I used that one until there was just a stub remaining. In fact, I used it every winter for 3 years to start the fire in our fireplace as part of my no match, no lighter challenge to myself. When you strike a ferro rod, you generate a hot spark that can ignite your fuel source.
- Magnesium block. With a magnesium block, you first scrape off shavings of magnesium onto the tinder (fuel) and then you strike the striker to generate a spark that will ignite the magnesium shavings, even when wet.
- Ok, I love fire, so here is number Lightweight magnify glass. This is a very powerful tool provided you have a sunny day. I used one a few months ago to start a fire and it was very fast! Bonus, it can also be used to signal search parties.
Water is life! Without it, well you know what happens. The prepared adventurer also knows that we must treat all water sources, even those that appear to be pristine, as though they were contaminated with viruses, bacteria and protozoa that can make us very ill. In life and in survival, it is often the things we do not see that can take us by surprise. Unwelcome gastrointestinal surprises can be mitigated by various methods of treatment.
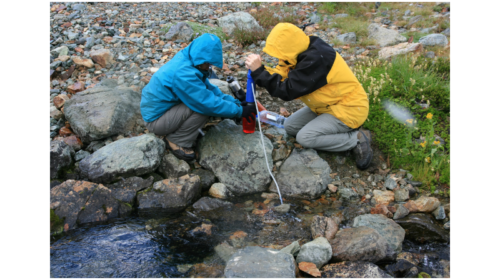
WATER
- Iodine tablets. When using iodine tablets, you need to make sure the thread of your water bottle is also treated. You can do this by twisting the lid just enough so the treated water can wet the cap and threads as well. It takes 35 minutes for the water to be fully treated. For those with an allergy to iodine, you can try using Chlorine Dioxide Tablets, but note that it will take 4 hours before you can drink the water safely.
- Water Pump filter. This method is a bit more expensive and heavier, however you will have fresh tasting water without having to wait to drink it. Make sure you use it at home first where you can trouble shoot any issues.
- Life Straw. This is a great light weight option for your pack. Simply place the filter side into your water source and drink. It is always a good idea to find a fast moving water source that looks and smells clean if possible.
- (Note: of course, you will want to have a water bottle as well as a small lightweight metal cup that can be placed over a fire if needed. 3- Boiling your water for at least a minute is another method of treatment to make it safe to drink.
Food is at the bottom of the survival checklist as we can go days and even weeks without it if necessary. Of course, that is far from ideal. Food is energy and without it, a bad situation can be made even worse when our gas tank runs dry, making simple tasks much more difficult. That said, I am not going to give any specific food recommendations in this post. Below are just some general ideas.

FOOD
- Even if you are only going for a day hike at your local park, having food with you is a good idea. It can be a simple granola bar or a piece of fruit. However, if you are going for a hike away from home, it is a good idea to pack a little extra food in the event you take a wrong turn, or some unforeseen event causes you to spend more time out in the woods than you anticipated. Think high calorie, high fat energy sources when planning your just in case food supply. It is good to ask yourself “Do I have enough food to spend the night if something goes wrong?”
That covers the essential must haves to prevent your next adventure from becoming a disaster. In Part 2, we will dig into the “non-essential” but ” I wish I thought of that” items and suggestions for your next adventure.

Remember, if you live in NJ or the Tri-State area and would like to learn more about the skills referenced in this post as well as other outdoor skills, fill out the Contact Us Form. Thank you for reading and stay tuned for Part 2.