Have you seen all the news stories recently, giving you permission to not rake your leaves? Turns out those leaf piles are good for your lawn, good for your garden, good for insects and for other animals. Soon you will have one more reason to keep those leaves where they are. This is the perfect season to start learning how to build survival shelters. Best part, you can do this right in your own backyard. Save those leaves and branches and get outside for some family fun!
In all my books and classes I stress the building of shelter as the first and most important physical survival skill students can master. Shelter is always built first in any survival situation, weather condition, or topography, for exposure is one of the greatest threats to the survivalist. Shelter also has great emotional and psychological benefits, for a shelter makes anyplace a home. Thus shelter is of the utmost importance for children, for it not only gives a safe refuge from the elements but also gives a certain sense of security and peace that is so important in calming freighted children. -Tom Brown, Jr.
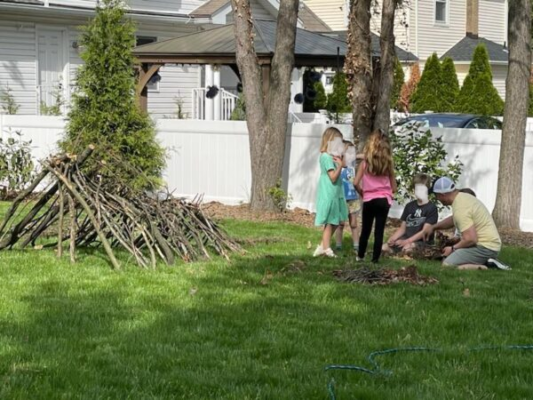
The above quote from Tom Brown Jr. says it best. It is the reason I also teach shelter first in my programs. What is not mentioned above, but is hopefully illustrated in my featured image, is that building debris huts can be a lot of fun to build! Before we get to the fun part, let’s talk safety.
Safety First: Whether you are building a shelter in the wilderness or in your yard, there are a few things to be mindful of:
- Location: Check for hazards. Look above. Dead trees, dead limbs, do not build there! Look down and remember, water always seeks the lowest point! Avoid building in depressions, avoid building at the bottom of a slope or hill, seek flat ground.
- Other natural hazards: Leaves of three, let it be! Poison Ivy, Poison Oak, etc. are not your friends. Get good at identifying the poisonous plants where you live. Also be on the lookout for ant hills, hornet’s nests, and animal burrows. Look before your build!
- Human hazards: You will be working with branches, leaves, pine needles and other natural materials that could hurt you and those around you if you are not practicing awareness! Always pay attention to those around you and to what you are doing. Sharp sticks and soft skin do not go together!
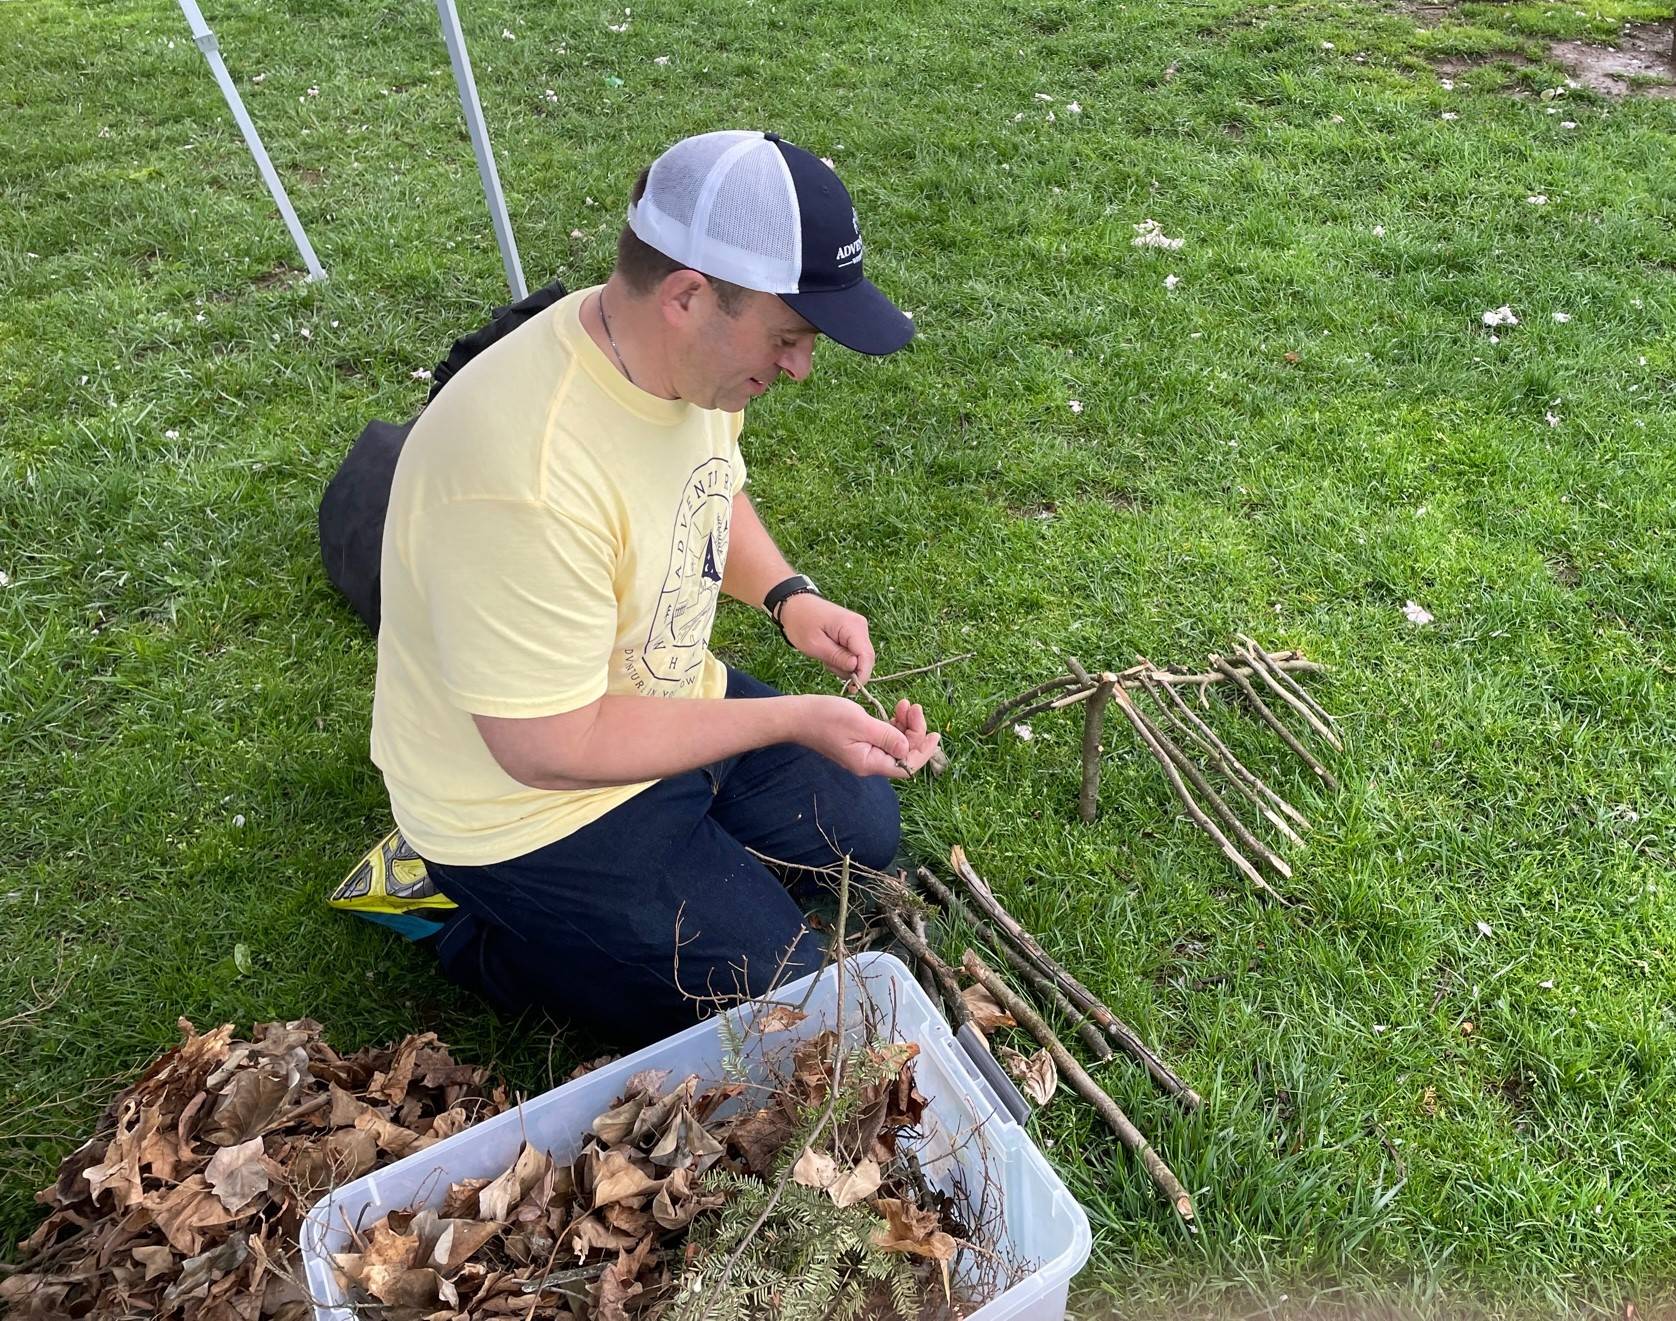

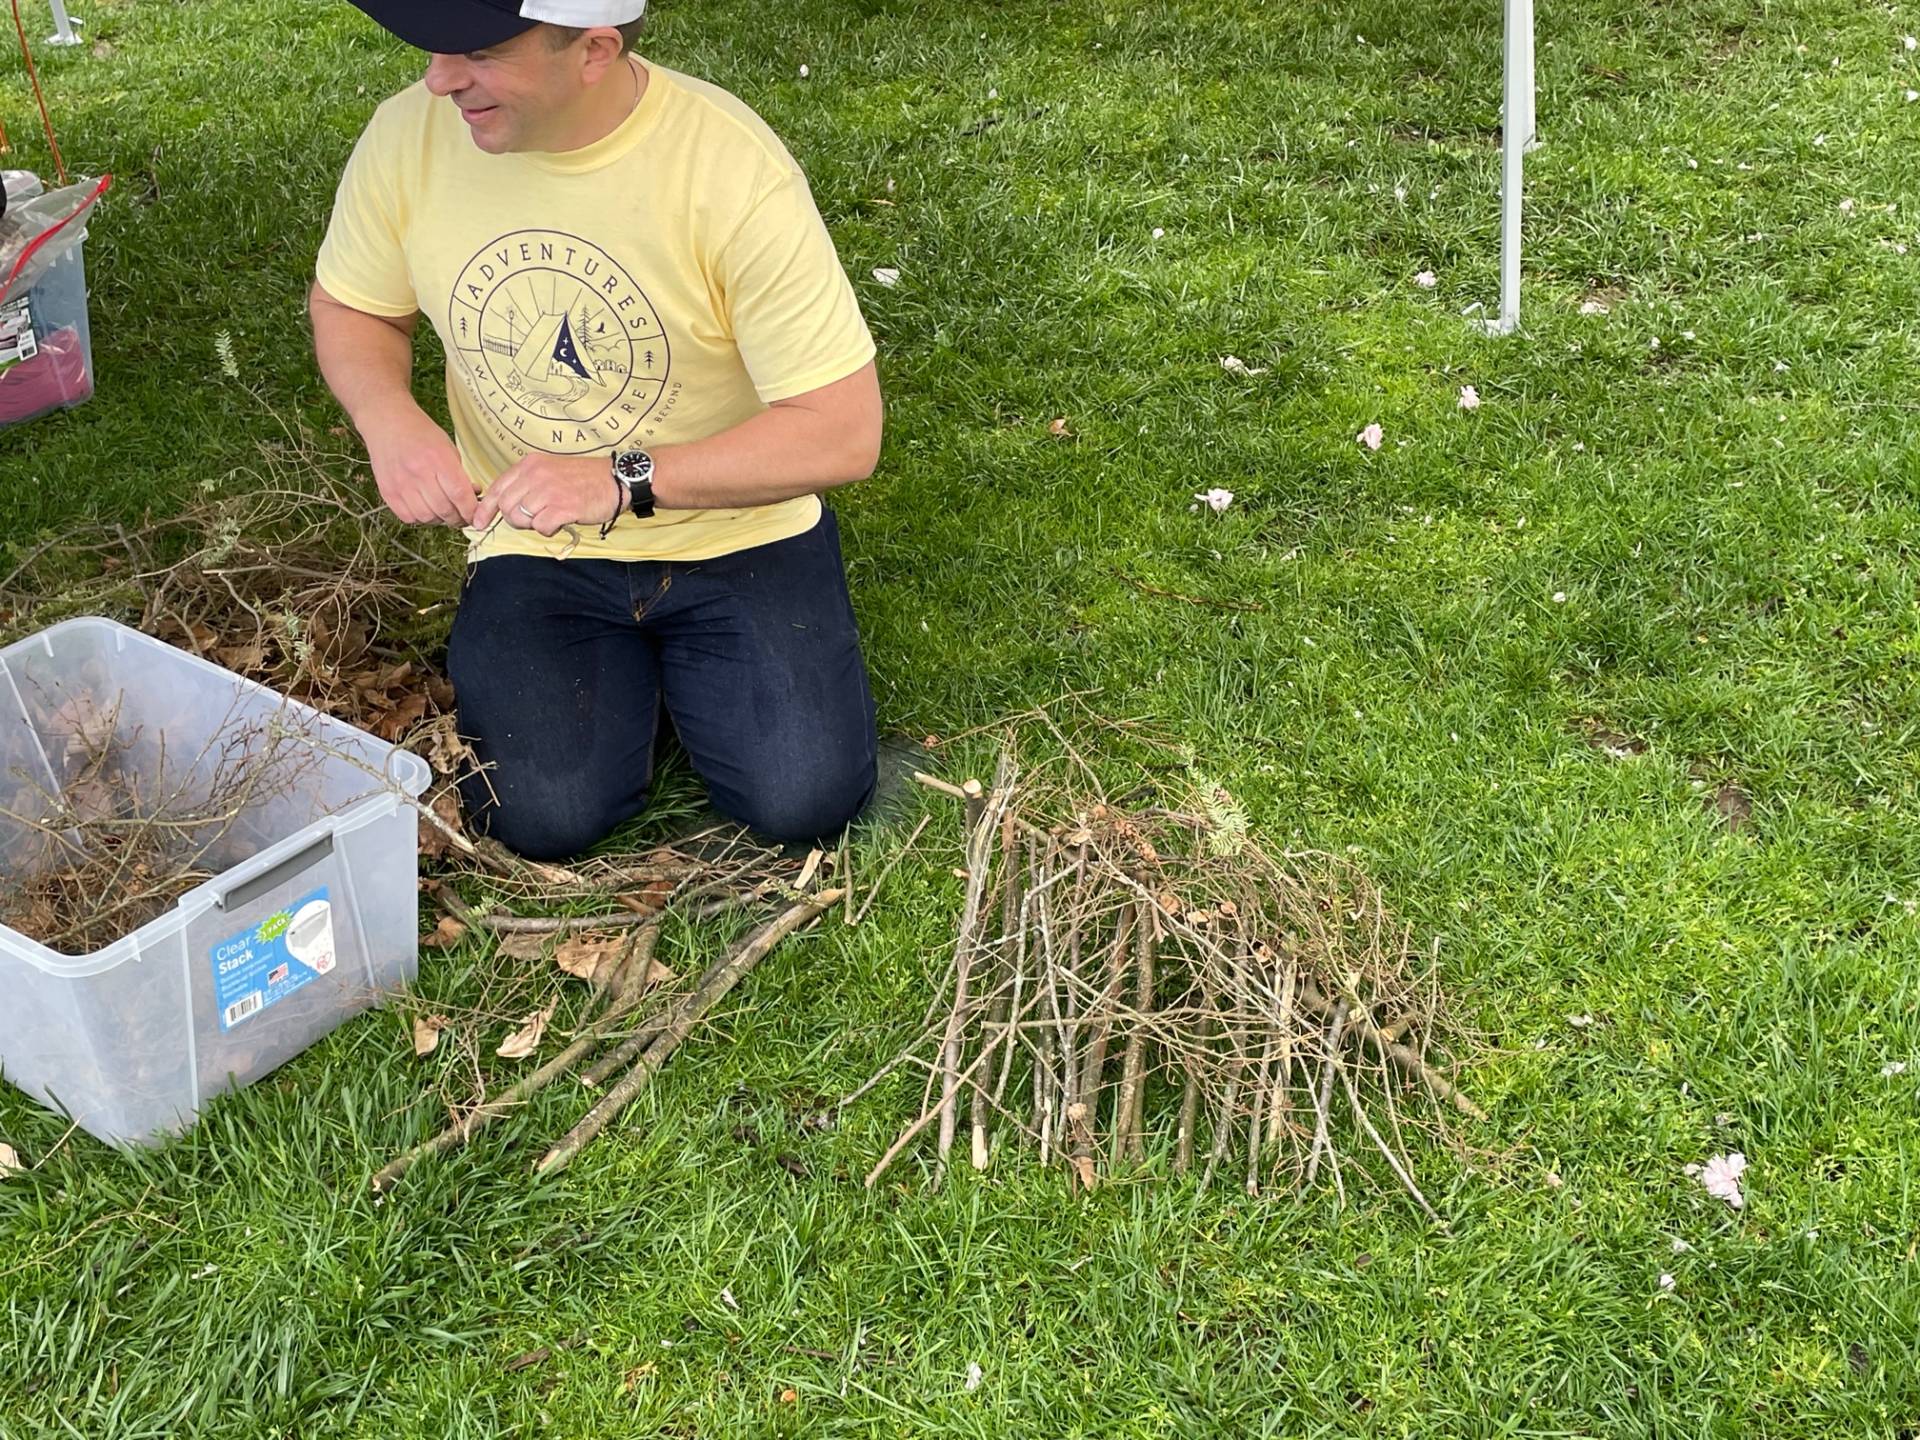
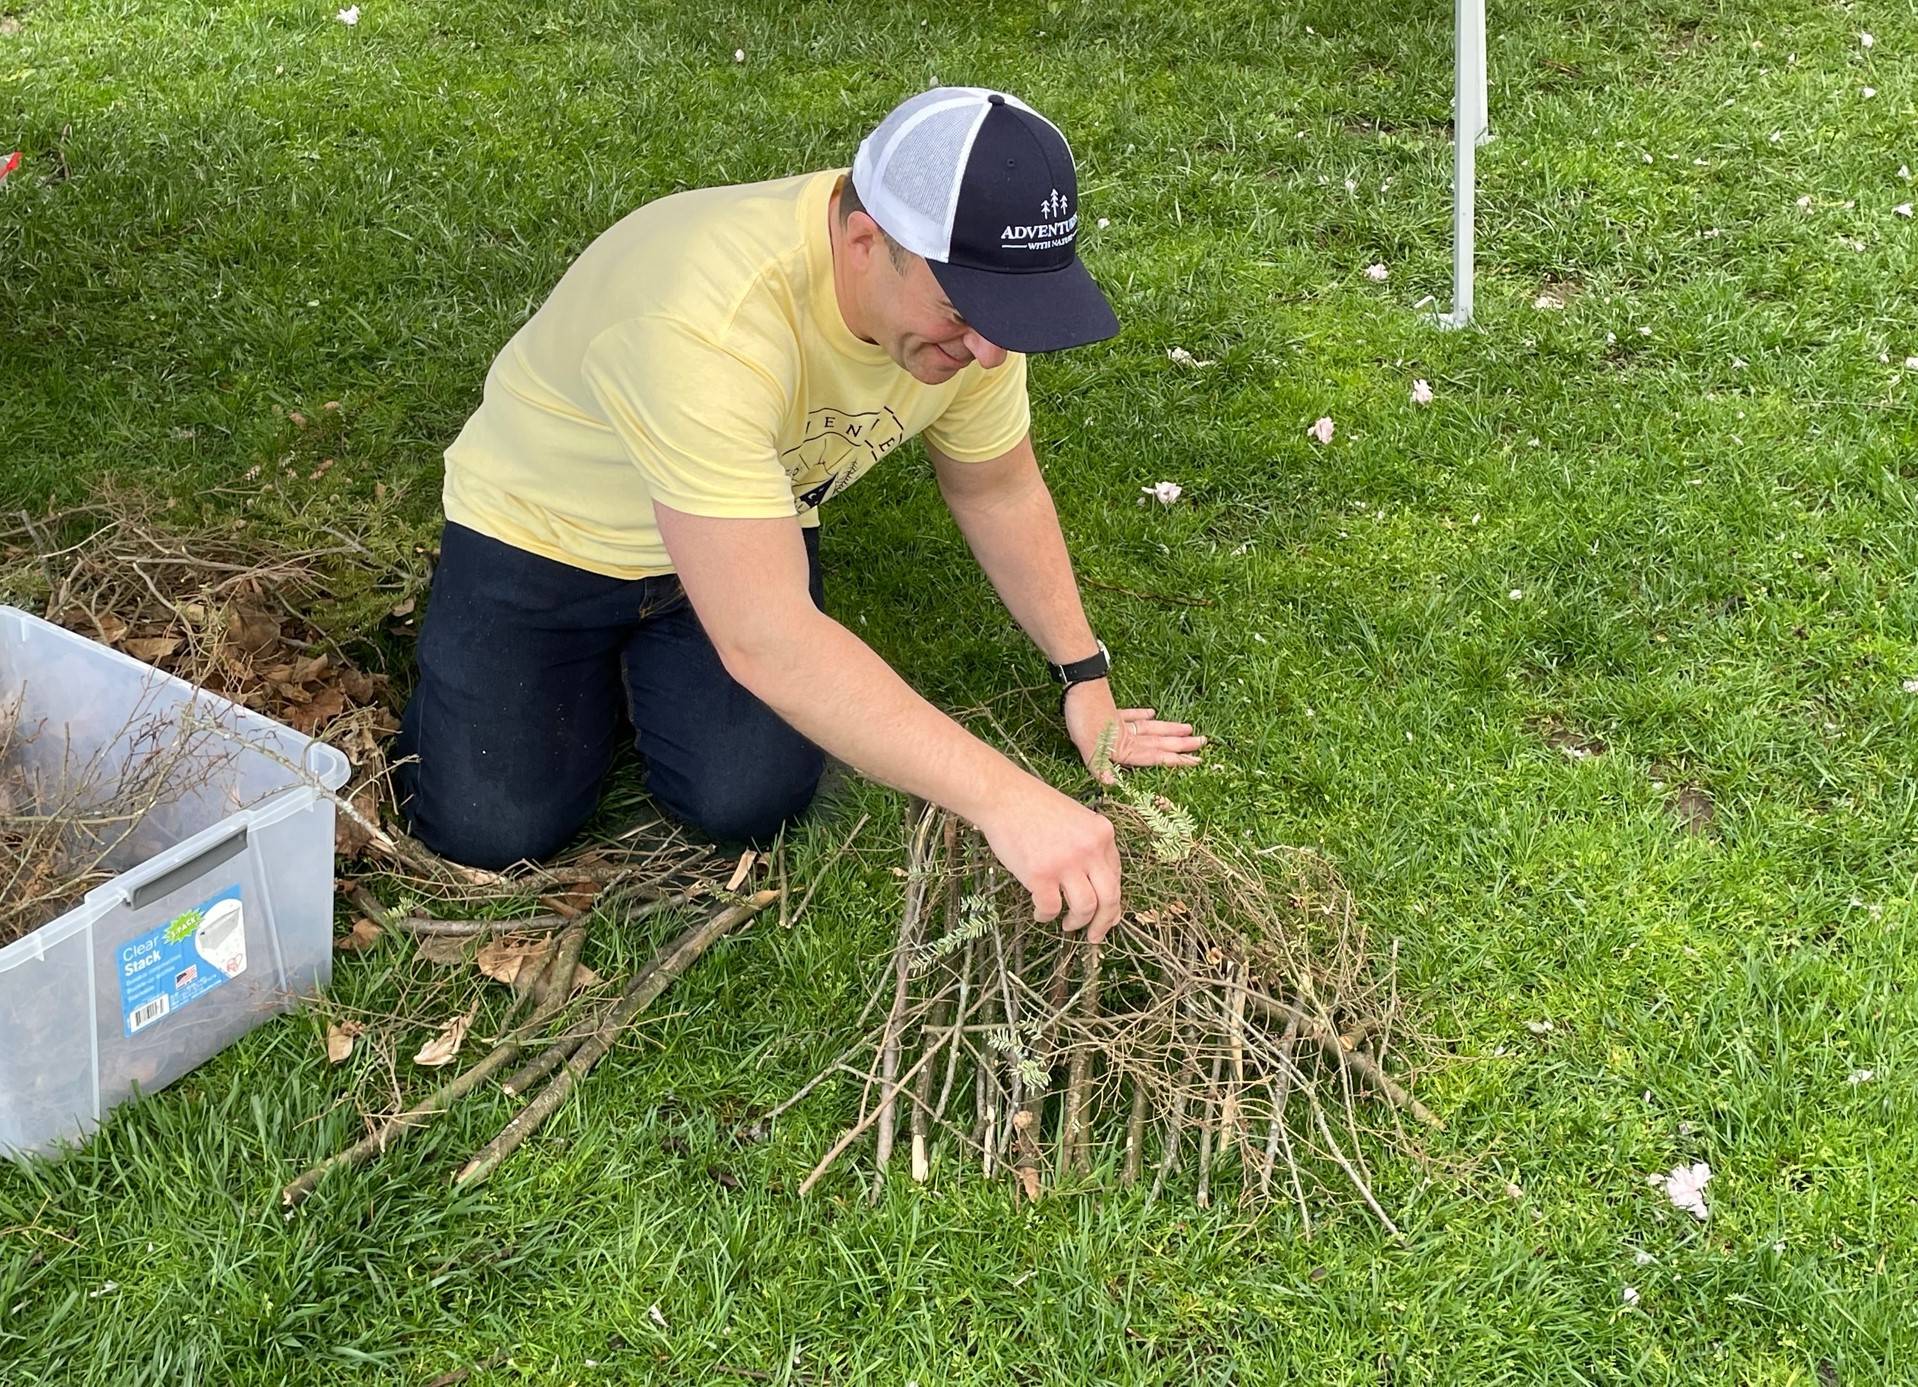
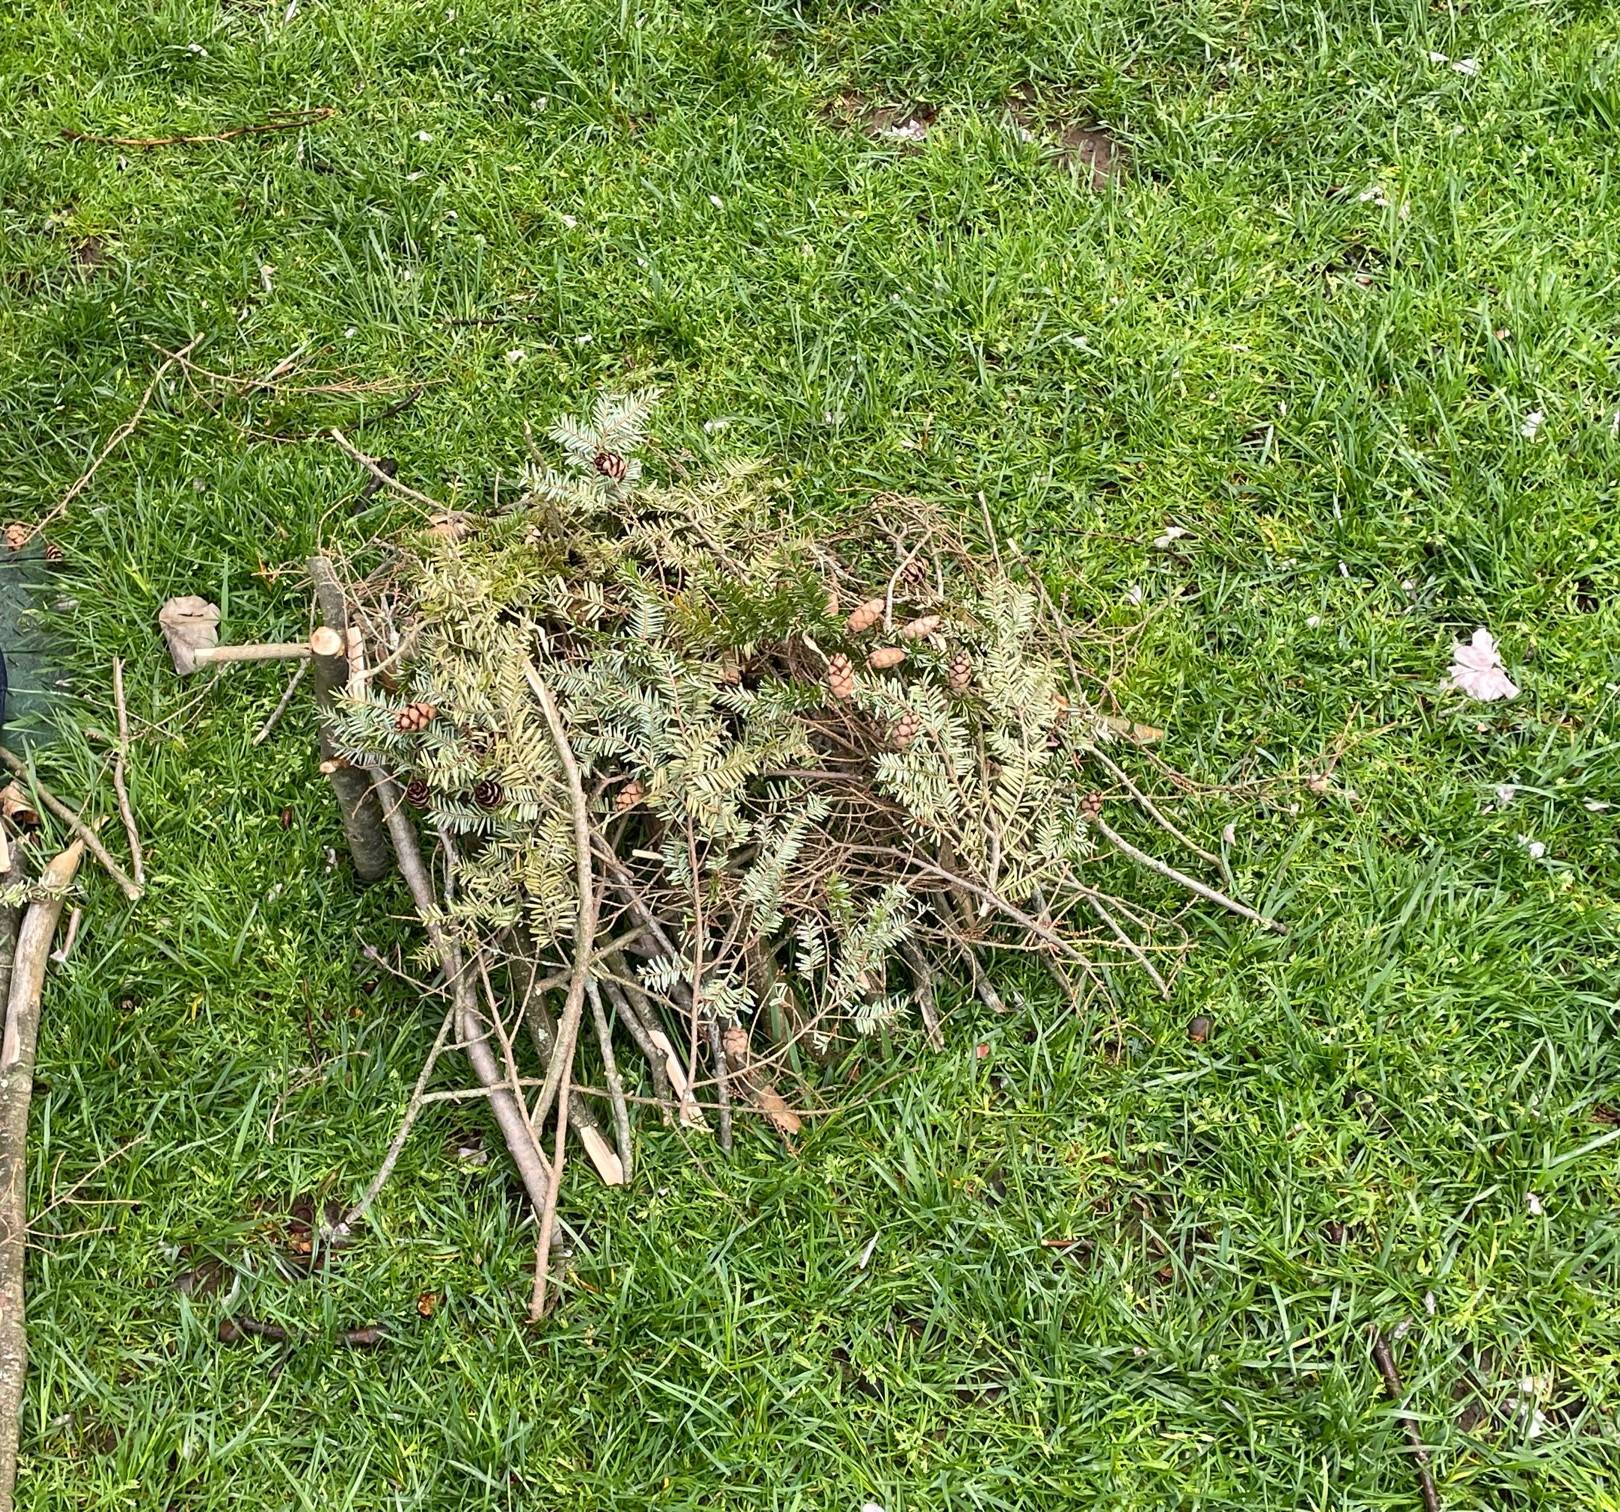

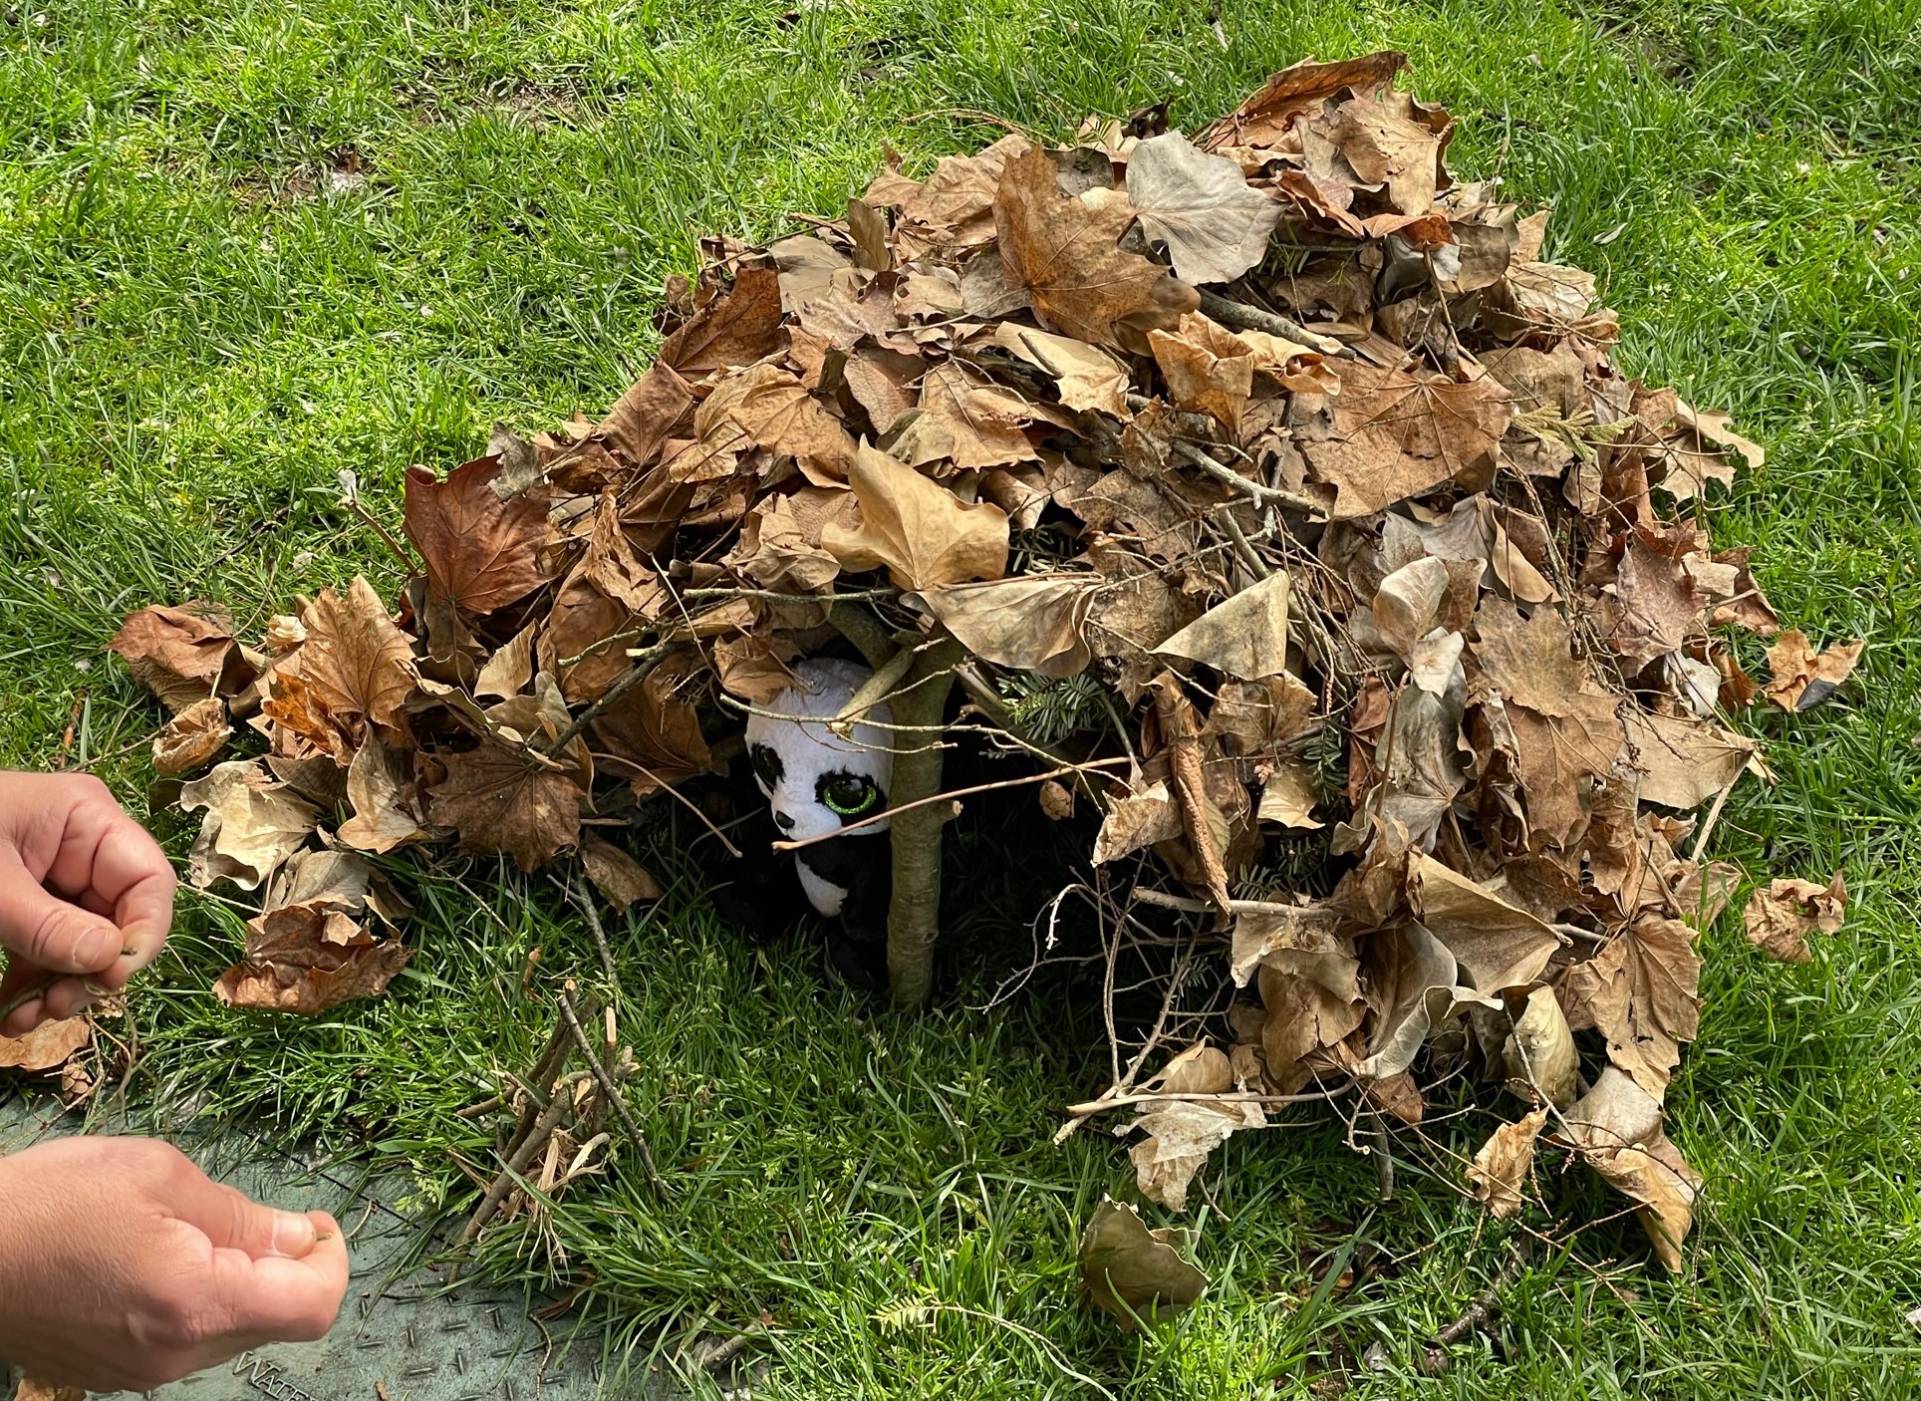
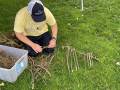
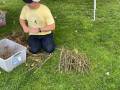

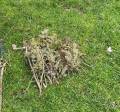


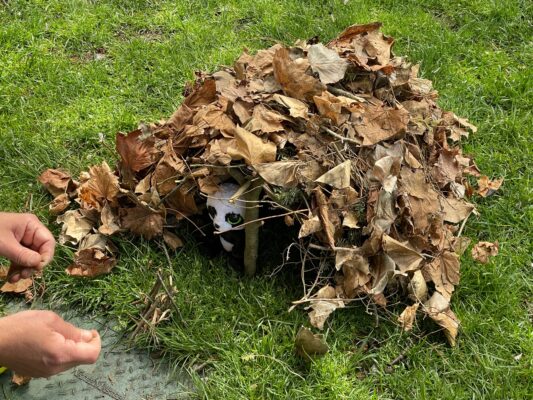
Debris Hut Construction Key Points: Ok, now onto the fun part. When I teach students how to build debris huts and if time permits, I start small. By small, I mean small enough to keep a stuffed animal protected from the elements. Once the students understand the following points, we get to the building and challenge portion. First, the key points:
- Parts of the shelter: You need a base to get things started. This can be a crook of a tree, a stump, or a Y stick. Next you will need the ridgepole, followed by ribs, lattice branches and debris for the shelter floor and for the roof and sides of shelter.
- Key point 1: The primary source of heat in a debris hut, is you! Your body radiates heat to keep the space warm, provided that you added sufficient debris to the shelter floor to prevent conduction (the cold earth drawing heat away from your body) and have piled on sufficient debris to the roof and sides of your shelter to keep the heat trapped inside to prevent convection, the cold winds entering your shelter to rob you of your precious heat. The smaller the shelter, the more heat efficient it will be. This is a shelter you are meant to crawl inside like a worm and cover yourself in the leaves and debris inside to survive the night.
- Key point 2: If you can see inside your shelter or see out of your shelter when inside, you still have work to do! The A-frame design and the debris acts like shingles on a roof, encouraging water to run off the shelter and not inside of it. Water will find a way in if there are gaps in your sides or roof.
The final part of the mini-debris hut challenge is the water test! Will your stuffy remain dry after you pour a copious amount of water on it? Only one way to find out! The next step in my programs is to construct a full-size debris hut as a group. This is a lot of fun and gives the participants an opportunity to go inside and admire their hard work. If the above sounds fun but you still prefer a leaf free lawn, hire me and I’ll bring everything we need for a debris hut building adventure. Click here to learn more.